Requisitos Previos
Antes de comenzar, asegúrese de contar con lo siguiente:
- Acceso root al servidor.
- Cuenta WHM con acceso root.
- Servidor con CloudLinux.
Para verificar si su servidor ejecuta CloudLinux, ejecute:
cat /etc/redhat-release
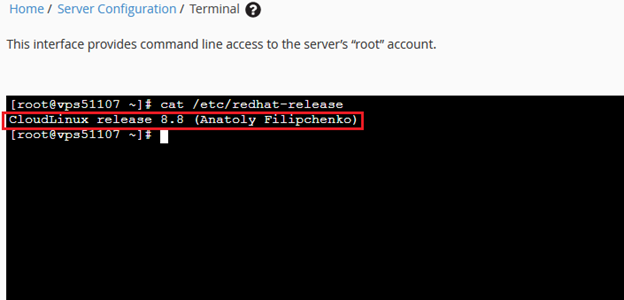
Si el resultado indica una versión de CloudLinux, puede continuar con la instalación.
Instalación del Selector de Node.js
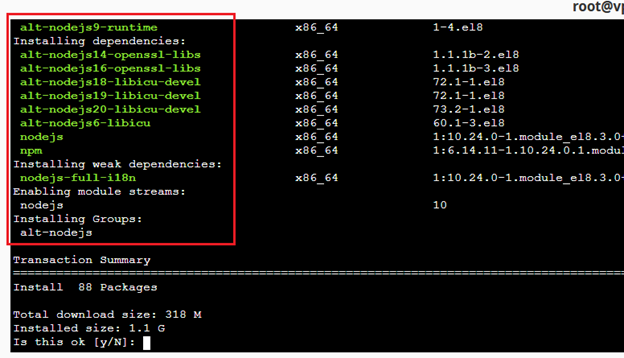
Ejecute el siguiente comando para instalar los paquetes necesarios:
yum groupinstall alt-nodejs -y
To install these additional packages, type the following command:
yum install lvemanager lve-utils ea-apache24-alt_mod_passenger
Apache Passenger is required by Node.js Selector.
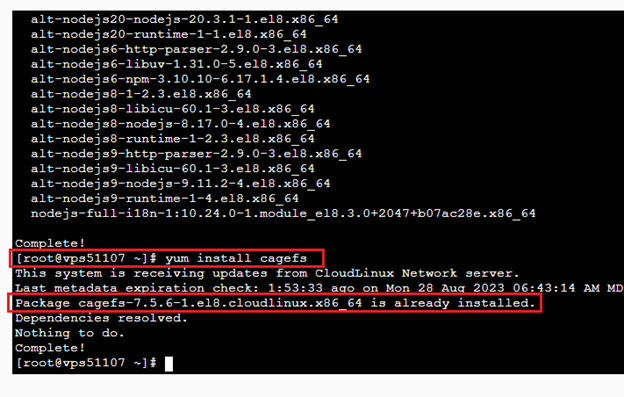
The final step is to ensure that the CageFS virtual filesystem is installed. As with the other packages, chances are that it’s already present. But just to make sure, type:
yum install cagefs
Finally, to complete the installation, restart cPanel as shown here:
systemctl restart cpanel
Making Node.js Available on cPanel for Your Users
Just because we’ve installed the components of the Node.js Selector, doesn’t mean that your users will automatically see it in their cPanel dashboards. You need to manually enable it from WHM. On the dashboard, type “CloudLinux Manager” inside the search box on the left-hand side as shown here:
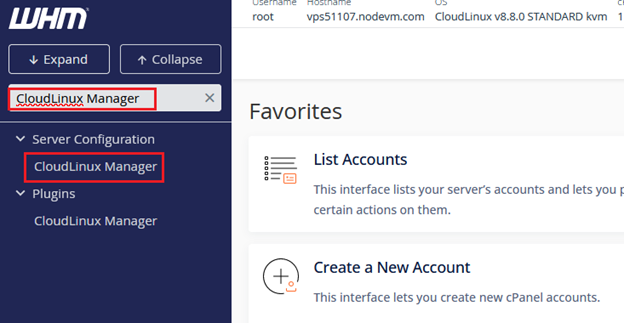
CloudLinux Manager
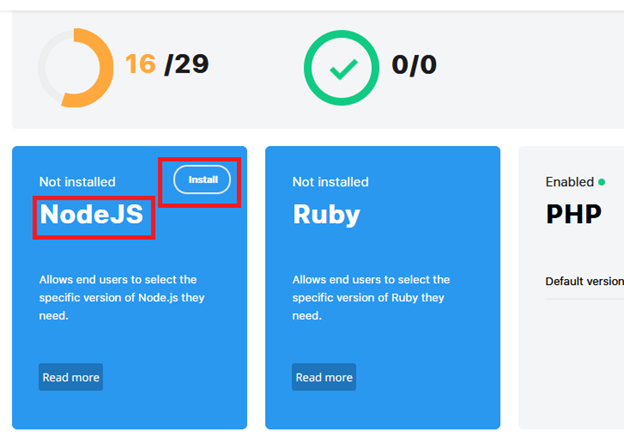
This brings up the CloudLinux configuration screen, from where you can enable and disable various aspects of CloudLinux. Thanks to the installation of the packages, Node.js should now be visible as a module:
Enable NodeJS
This will take you to the subsection where you toggle the button enabling Node.js, along with the various versions of the framework. You can use this section to determine to which Node.js versions your users have access. It allows you to enable and disable each version separately:
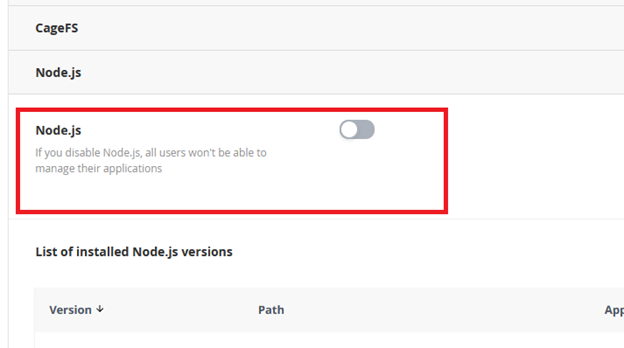
Toggle NodeJS
Save your changes, and you’re done.
Using the Node.js Selector in cPanel
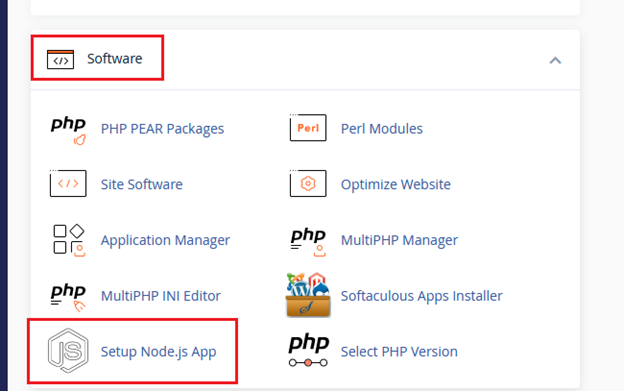
Your users can now access the Node.js selector in cPanel with the versions you’ve enabled. To test this, log into an account’s cPanel dashboard and scroll down to the Software section to select “Setup Node.js App”:
cPanel Software Setup Node.js App
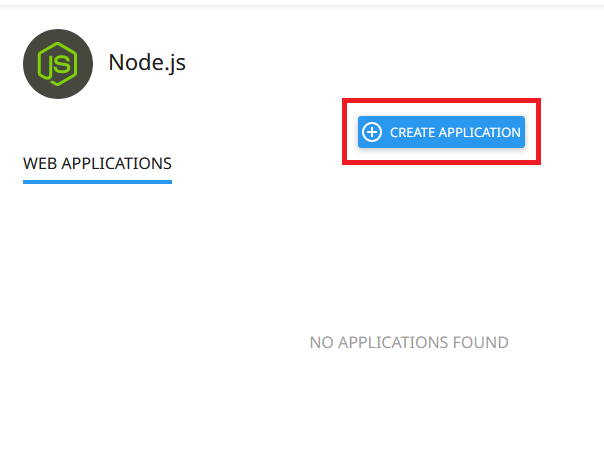
If you already have some Node.js applications on your server, you’ll see them in the following screen and you can manage their Node.js versions. If you don’t have any applications so far, click “Create Application” as shown here:
Create Node.JS Application
In the application’s configuration screen, you can select the version of Node.js that you want to install from the dropdown box:
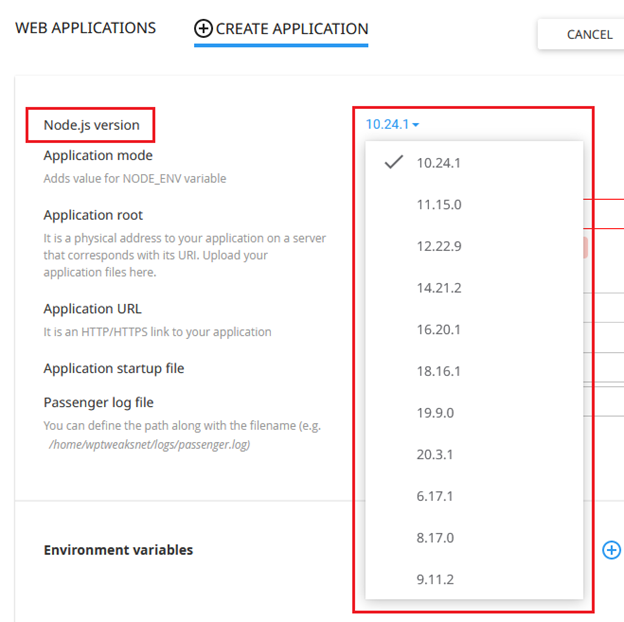
Select NodeJS Version
Now your users can start creating Node.js applications from scratch using cPanel!